 by Kimberly Williams Happy 3rd Birthday to us! Next birthday, when we are back together in person, we will have two cakes to celebrate! We approved the minutes for last month's official membership meeting, which introduced nominees for select Puddletown Board positions. After the minutes were approved, we voted in our new Board members. We now have a virtual free table on our Ravelry forum. Post what you have to share, browse what is available, or post an item you need. It's not the same as the free table at the meetings, but better than nothing. Anna shared her camera setup with us and the trials she went through to get to the current iteration. In the beginning, her genius led to balancing her phone on a yardstick supported by boxes on either end. Now she uses a tripod with a camera attachment. Stitch markers galore! Anna shared many different types of stitch markers. I bet you will learn a new use for stitch markers or something new to use as a stitch marker. Watch the video below and stay tuned next month for tips on the Kitchener Stitch and grafting. This month, Kay Hopkins of Knit for the Soul joined us to discuss the benefits of knitting top down sweaters. The primary benefit is the ability to try on a sweater as you knit it, so you have no surprises when you've finished the sweater. Kay suggests checking on the fit of your sweater a few rows before the arm divide, a few rows after the arm divide, at your true waist (the smallest part of your abdomen), and before the hem (usually ribbing). You can also check in on the fit by laying the sweater in progress against a sweater that fits you well to see how it compares. Common fit problems can usually be addressed and Kay recommends reaching out the designer to see if they have any ideas. In her own designs, Kay favors a hybrid yoke for a good universal fit. She combines circular yoke designs with a bit of raglan increases. Bonus tip from Kay: bind off sleeve cuffs after you have blocked the sweater as sleeves tend to grow even when the rest of the sweater doesn’t. As a newish sweater knitter, this has happened to me. Thanks, Kay, for sharing your passion for knitting and the PNW, as well as your expertise on sweater knitting. We are thrilled to see more pictures of members projects for our virtual show and tell.
0 Comments
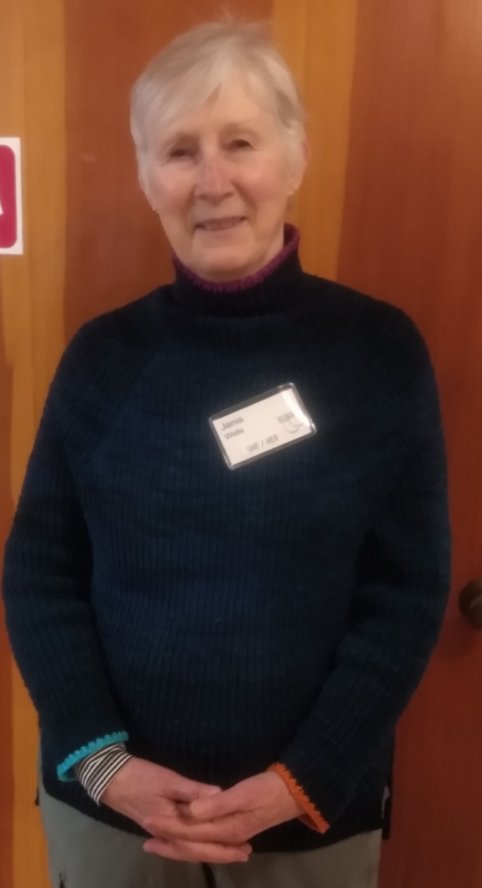
by Kimberly Williams The last month brought some losses to our knitting community. Cat Bordhi turned sock knitting upside down, reinventing the way we think about socks and so many other things. She passed away from cancer on September 19th. One of Puddletown’s founders, Judy Welles, passed away on September 28th, also from cancer. Judy was the guild’s first volunteer coordinator and was dubbed “Volunteer Wrangler”. She had an unfailing good mood and cheerful outlook on life. The guild extends our condolences to both Judy and Cat’s families and friends. We will honor Judy by continuing to build our guild community and knit in friendship. Anna brought forward a designer recommendation this week. Elizabeth Zimmerman (1910-1999) was a teacher and designer who reintroduced and encouraged continental knitting after WWII as a more efficient method. She also demonstrated the benefits of circular needles and their easing of complicated designs. She brought us the Baby Surprise Jacket and the Pi Shawl. To learn more, check out her books. Knitting a cable without a cable needle was this month’s theme. Anna did it again by making that complicated cable sweater I’ve been eyeing much more desirable. I knew, in theory, one could knit a cable without a cable needle, but I thought it was only for the brave. Anna showed us how to knit 1x1 and 2x2 cables without a cable needle and made it look easy. I’m not sure I can describe in words the process without taking up the rest of your day. Just watch the video and be amazed. Next month, bring us your stitch marker tips and tricks. Don’t forget, Anna, our Tip Czar, welcomes you to demonstrate a tip or just share the idea for her to present to the guild. We welcomed back our first ever speaker this month, Michele Bernstein, a.k.a. PDXKnitterati. She started off her lecture on blocking with a poll. 39% of the audience said they always block, 34% said they usually block, 19% said sometimes, 7% said never, and 4% said “What’s blocking?” Even Michele had to be convinced to block and she presented three cases of sweater care gone awry. Blocking is the process of treating your knit or crocheted item with moisture and shaping. You can do this by steaming, or washing and air drying, usually flat, in the desired shape. Blocking allows wool and silk fibers to bloom, cotton and linen fibers to soften, and stitches to even out and set into the fabric you created. It is especially important in opening up lacework and for colorwork and cables to truly shine. Some tips for the process:
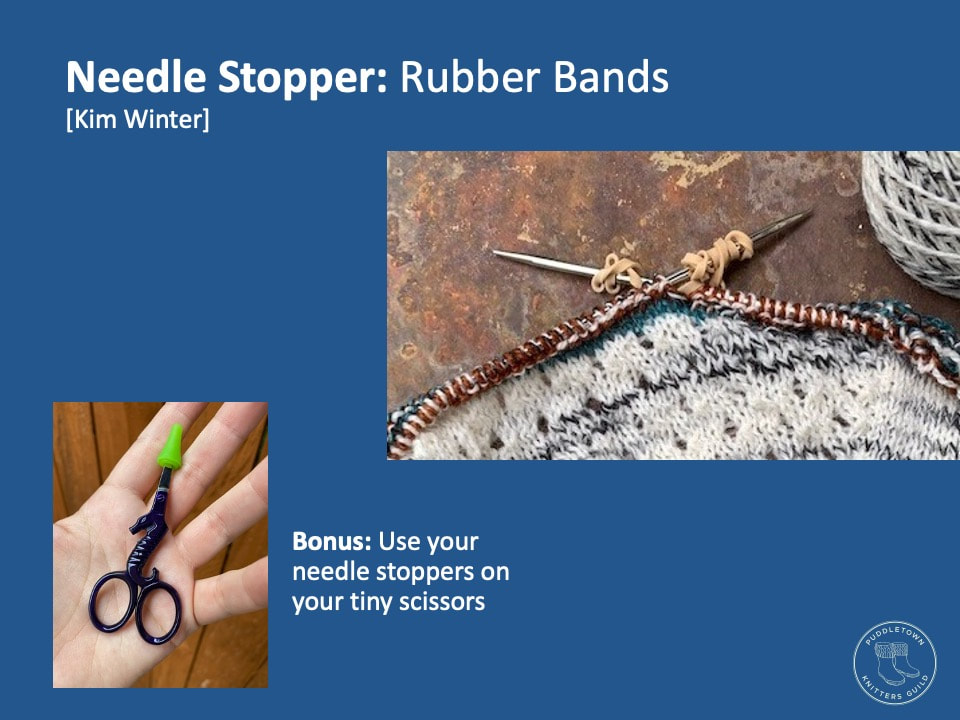
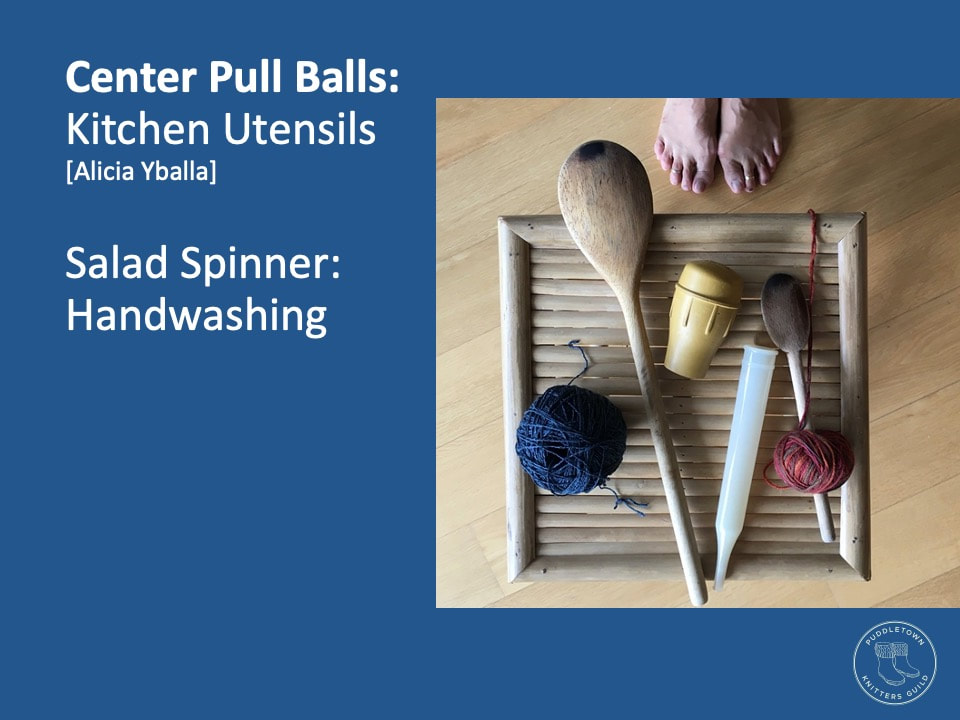
Thanks, Michele, for a great presentation! We were happy that again several people sent in pictures of their finished projects for the virtual show and tell. Enjoy knitting weather until we see each other again. by Kimberly Williams On a night when a lot of us needed a break from reality and the comfort to be found in our knitting community, I hope you joined the meeting early enough to hear Anna’s spontaneous Puddletown theme song. It lifted my spirits right away. The member tip theme this month was how to pick up stitches when you have to frog several inches. "What’s frogging?" you ask. It's when you “rippit, rippit” for quite a few rows. First off, breathe, be calm when your knitting is off the needles. Then try one of these tricks. Set yourself a save point by running a lifeline as you work, especially useful when you are working on a new skill or complicated bit of lace. It's easy to do with a set of interchangeable needles by using the hole in the needle tip meant for tightening a cable to a tip. Thread some scrap yarn through that hole leaving a good tale on the other side. Then knit as normal, the scrap yarn will get carried through each loop of the row and create a row that you cannot frog past. Or, you can add a lifeline afterwards by threading a tapestry needle with scrap yarn and carefully weaving it through all the stitches in a row. Here’s a good place to remember the previous tip: the right leg goes in front. Another method is to rip out to one row above and then slowly pull out the intended row, one stitch at a time and immediately pick up that stitch. Anna suggests pulling up on the stitch above to open up the stitch you need to pick up. Next month, the theme is all things cables. Do you have tips on how to work with cable charts, how to remember the twists, even tools you love to help? Send them to Anna and she’ll work her magic to teach us all something new. Our speaker this month was Renate Yerkes, a.k.a. Elphino PDX, who spoke with us a year and a half ago on double knitting. This time she presented the history and style of Selbu mittens. After separating from Sweden in 1905, the Norwegians sought a national identity and used knitting to help them find it. The Selbu mittens became part of their national image after a young girl in Selbu, Norway wore a pair to church featuring the selburose, or eight-pointed rose. Everyone wanted a pair of the striking two color, lush mittens. By the 1930s, Norweigans were knitting 100,000 pairs every year exporting them to surrounding countries. Standards were set to maintain the traditional styling through proportions and the geometry underneath the many motifs. The mittens offer several areas to customize the design. The cuff can be ribbed for winter sports or lacy for a bride’s trousseau. The top of the hand usually has a larger scale motif, while the palm generally has a smaller scale repetitive motif. Both sides of the thumb can be different, the underside often bearing initials of a newly wed couple or a family emblem. Renate’s favorite needle size for knitting Selbu mittens is a 2.75-3 mm needle, typically she favors ADDI flexiflips for ease of turning the tight corner on each side. A great question was posed about the floats on the inside of the mittens snagging on rings, but Renate said the floats are short and with the thinner yarn and dense fabric created, it isn’t usually a problem. Who else immediately started hunting patterns and yarn to make themselves a pair? We are thrilled that every month members come forward with wonderful pictures enabling us to keep up with the virtual show and tell. by Kimberly Williams Our August meeting started with a talk show aspect with the Zoom hosts welcoming attendees, reminding people that we can’t see their Star Wars jammies, pondering whether there are Hamilton jammies, and mostly helping people enter the raffle. Whoa! Over 100 people wanted to attend our meeting this month. We’re sorry to those of you who missed it live, but we are pleased as punch for the attention (and we've upgraded our plan to allow more of you in). The member tip portion included a new segment this month, entitled “Things Anna Wished She Knew Earlier”. For the first one, Anna showed us how the legs of our stitches should sit on the needle. The right leg goes in front of the needle. Our themed tip this month was how not to twist your stitches when joining them in the round. Anna highly advises laying your needle on a flat surface, even if that means getting up from your cozy spot on the sofa. Once laid flat, you can follow the bottom of the cast on edge and keep it on the inside of the circular needles. You can also knit one, or two, rows flat before joining in the round, which gives you more fabric and makes it easier to see any twists. Remember those running stitch markers Anna showed us a couple of months ago? You can use that same method to help keep your cast on straight or even count your cast on as you go. This may be especially useful in brioche. The mind blowing tip this time comes from Alicia Yballa, who pointed us towards a Carlos and Arne video. If you have joined in the round and as you knit you find a twist, keep going until you get to the last stitch. While carefully holding your needle tips, untwist your work and move the twist over the left needle tip. Now that twist is hidden in a way no one will ever see. Lorilee Beltman joined us from Seattle to present her technique, vertical stranded colorwork, for Puddletown’s first ever hands-on lesson. This style has been her personal knitting playground since 2008. First, she gave us a tour of her studio and showed us samples of vertical stranded colorwork (VSC). Unlike other colorwork such as fair isle or mosaic, the contrast color in VSC only exists in that one column of the knitting. It’s an easy way to modify seed stitch or garter stitch to give a pattern your very own flare without losing much stretch. Lorilee focused on cables with us in the hands-on tutorial of her presentation. She was a great teacher, allowing time for us to practice and demonstrating for three different styles of knitting. The main thing to keep in mind was the main color leads and the contrast follows. Also, take the time in the beginning to manage the spaghetti of contrast colors with butterfly knots or chip clips. 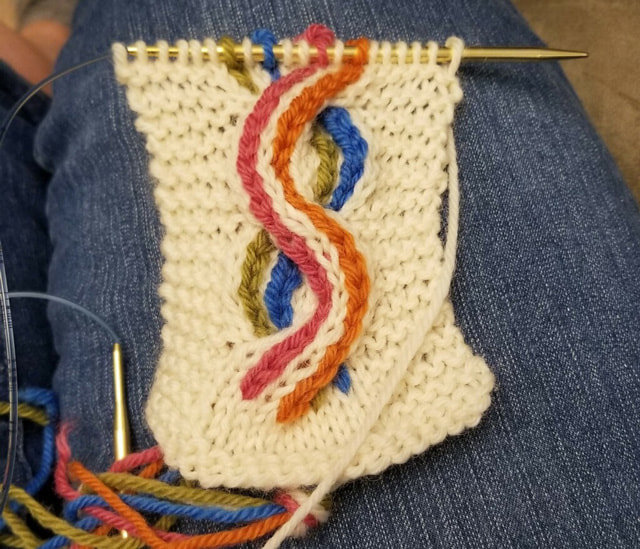 She gave us a code for a free copy of her hat, Colors that Climb Sampler—watch the video again to get it (or email us). I’m excited to try it and practice holding the main color in my left hand (Continental style). 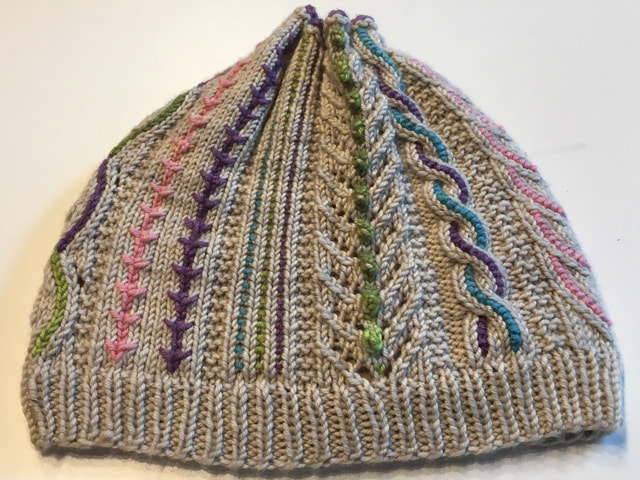 Once again several people sent in pictures of their finished projects for the virtual show and tell. July 2020 Meeting Recap: Mary Mortensen Discusses Stranded Knitting, Member Tips, and Show & Tell7/14/2020 by Kimberly Williams Another month, another virtual meeting. It just isn’t the same as seeing your faces, but at least we can be in our jammies. Our first round of stuffed animals was sent to Butterfly Boxes. Adrienne Enriquez updated us on the refugee situation in Portland. As very few refugees are arriving in Portland currently, Butterfly Boxes reached out to their partners to have the stuffed animals delivered to children in families with a member suffering from COVID-19. Keep knitting, crocheting, and sewing stuffed animals. This world needs more love right now. And remember, you can knit clothes for store bought stuffed animals, too. This month Kim Winter filled in for Anna to present member tips. The theme this time was non-knitting tools we use for knitting. There were some good ones. From photo boxes and zippered bags for needle organizing to rubber bands for needle stoppers. We also saw medication organizers for notion storage and stretchy rubber tourniquet material for gripping needles. Any cylinder in your house will work to start winding a ball of yarn. If you like to snack while knitting, use chopsticks or small tongs to grab those Cheetos to keep your fingers and your projects clean. What about a salad spinner to get the excess water out of your washed garments before blocking. It’s hard to pick a favorite of this lot, but I think mine was the needle buddy made of a swatch pinned to your chair for easy storage of your working DPN or crochet hook. Next month's member tip theme: how to prevent twisting when joining in the round. I can’t wait to see what ingenious ideas you all have. Mary Mortensen stayed up late and joined us via Zoom from Kansas. Her presentation was all about steeking as well as some of the history of stranded colorwork. Stranded knitting is knitting with at least two colors on a single row where the yarn not in use strands or floats across the back of the work. These strands add a layer of warmth which was highly valued in the northern climates where the technique originated. Fair Isle is a type of stranded knitting using multiple colors made popular by a 1921 portrait of Britain’s King Edward VII sporting a Fair Isle sweater. The intricate patterns created by stranded knitting are easiest when knit in the round and without breaking for arm holes. That’s where a steek is needed. A steek is the bridge of stitches added to the work that allow an opening to be cut without interrupting the stranded colorwork. Mary showed us several examples of these steeks. Steeking is often referred to as the process of actually cutting the knitting. Mary shared many ways to reinforce the edges after you make the cut. Wool is naturally sticky making it a good choice for projects requiring steeking. For other fibers, you can reinforce the edges with a double line of machine sewing or hand sewing. Make sure you pierce the yarn and don’t go between the knit stitches. You can also crochet a line on either side of the column to be cut or even use needle felting techniques. If you are steeking to make a cardigan, you will probably be adding a button band or some kind of edge after you cut the steek. To finish the inside edge, you can sew on bias edging to cover the raw edge. You can pick up stitches along the raw edge and knit a facing that you then tack down. Other tips from Mary included being consistent in how you hold the yarn; the direction the yarn comes from will determine which color dominates; and that your gauge in stranded colorwork will most likely be different from single color stockinette. If your project includes stranded and single colorwork, you should check for the last tip and possibly change needle sizes to keep the gauge even. To achieve a smooth finished piece, avoid puckering by using less slippery wooden needles, or turn your knitting inside out as you knit to give your strands further to travel. For first timers, find a smaller project with only two colors with short floats and short pattern repeats. Think hats or sweaters with the colorwork only in the yoke. And don’t try to add a steek to your first stranded colorwork project. Check out this great group on Ravelry for more tips and a collection of free patterns. Here's a list of other resources from Mary. Mary did a fabulous job of explaining a difficult technique that would be so much easier in person. Thanks for taking on that challenge! Once again several people sent in pictures of their finished projects for the virtual show and tell. Want to watch the meeting? Click here. by Kimberly Williams The raffle is back! Our board members have been hard at work in the last month to bring the raffle to our virtual meetings. And it was a success! Three lucky people will be receiving their prizes in the days to come. On a serious note, the past weeks have been difficult as well as inspiring. When we formed this guild three years ago, our main mission was to create a diverse community of knitters. Now the board enhances that vision by committing our organization to being an anti-racist community of fiber artists. Please join us in the hard work ahead. Check out and support BIPOC makers, designers, and dyers. Below are just a few of the many talented Black members of the fiber community. Kathryn Gearheard updated us on our sister guild, the Brave Girls Knitting Guild. In her previous visits, Kathryn taught the members to knit using straight needles and they showed no sign of interest in circular needles. However, as they delve into the realm of baby sweaters, they have joined Team Circular. When the world opens back up again, we will host a circular needle drive to add to the straight needles we have already collected. It is inspiring to see the Brave Girls using knitting as a marketable skill rather than just as a hobby. Anna knocked it out of the park again with our member tip. This week she showed us a new way to count rows and how to place a running stitch marker using a darning needle and contrasting yarn. To count rows, run a needle up through a column of knitting and gently separate. Count the bars revealed to get your row count. Oh boy, does this change my knitting world! And then, Anna took it even further by showing us how to keep track of those rows. Check out the video to see how she does it. This technique can help track increases, decreases, and the length of the work. Not to mention motivate you on neverending stretches of sweaters or socks. Member tip themes! I told you that Anna was on fire this month. To help inspire us and jog our brains on the great things we know that others might not, we will now have member tip themes. Each month, Anna will tell us the theme. If you have an idea or trick, send us an email and Anna will incorporate it into her presentation. July’s theme: Non-knitting things you use as knitting tools. For example, Anna uses a bread clip to wind up tails until she weaves them in.  Capitalizing on our virtual meetings, we went all the way to Kansas City to bring you Cheryl Murray’s presentation on casting on and binding off. She is a teacher of 15 years, designer, member of the Sunflower Knitting Guild, frequent customer of Yarn Barn, and known as Prairieknits on Ravelry, Twitter, and Instagram. We all have our tried and true method we prefer to cast on and bind off. However, if a designer calls for a specific cast on method, Cheryl says there is probably a reason, for example, a particular look or desired stretchiness. You may also want to try a different method to achieve a decorative feature or use a provisional method to keep live stitches to add something extra later. There’s no way Cheryl could cover all the numerous methods, so she outlined some problems with the standard long tail cast on and some tips to overcome them. First, long tail cast on needs a tail, right? But how much? I have definitely cast on a whole lot of stitches only to run out of yarn at the last few required. I have also started over when I ended up with way too much tail that I couldn’t stand to leave and waste that yarn. Yep, even started over when the cast on number was multiple hundreds. Cheryl, thank goodness, gave us some rules of thumb to guesstimate the length of tail. If your finished dimension is 20”, multiple 20 times 3 to get the length of tail you need. Or allow 1” for every stitch e.g. 40st = 40” (these tricks usually work for worsted weight). Or wrap the yarn around your needle 10 times, then measure the length. If it is really important, cast on 10 stitches, then pull them out and measure the length. Next, Cheryl addressed the issue of long tail cast ons being too tight, either to knit into or as a finished edge. Use a finger on your left needle to eyeball and mark the spacing between cast on stitches. You can cast on using a larger needle but that doesn’t always work. She advises practicing until you cast on properly. Remember, hug your needle with the yarn, don’t strangle it. I thought that was a great way to focus my cast on energy. The last issue Cheryl discussed was the reversibility of the long tail cast on. Typically it is not a reversible method. Meaning, the long tail cast on makes a row of knitting. If you turn and start working your right side row, that cast on row is the opposite of what it should be. Some patterns fix this by adding a purl row before the pattern starts. If it doesn’t, you can add one in, but double check it doesn’t mess up counts. Or cast on purlwise. All you do is reverse the order of the knitwise long tail cast on. You can even cast on in pattern which is great for ribbing which gives the edge a little extra stretch. Cheryl also demonstrated the Estonian method with the optional double yarn start for an even more decorative edge. And lastly was the Twisted German cast on, also known as the German Long Tail cast on, and also as the Old Norwegian cast on. As too tight bind offs are a common problem, Cheryl covered a few ways to help. If you need just a little extra stretch, try the Suspended bind off. This method basically prevents you from pulling too tight. The Elastic bind off is also good for just a bit more stretch. If you need to stretch the edge to the extreme for a lace shawl, try the yarn over method or Russian Lace bind off. So much great information here and in her handout. Thanks, Cheryl. Cheryl recommended these two books: Cast On, Bind Off: 211 Ways to Begin and End Your Knitting and Cast On, Bind Off: 54 Step-by-Step Methods Once again several people sent in pictures of their finished projects and we were able to put together our virtual show and tell. Want to watch the full meeting? Click here. by Kimberly Williams May’s virtual meeting presentations started with Anna sharing tips on how to keep track of what sized needle was used for a gauge swatch. Method 1: add a series of yarn overs to a row of the swatch. For example, if you are knitting with size 5 needles, you would add 5 yarn overs with their corresponding K2TOG (YO, K2TOG, YO, K2TOG, YO, K2TOG, YO, K2TOG, YO, K2TOG). Method 2: add knots to a tail to equal the needle size. Method 3: add a numbered bead to a removable stitch marker. This last is my personal favorite, as I love an excuse to buy beads. Click images below to see examples. Our speaker for the month was Luigi Boccia, co-owner and operations manager of Brooklyn Tweed. He took us through the process of launching a new yarn and gave us an exclusive preview of their next yarn, Dapple. After 10 years of focusing on growing a business and maintaining their goal of sustainably sourced and milled yarn from the U.S., they were ready to challenge themselves and create something a bit more playful. Dapple blends cotton, a renewable, sustainable fiber, with Merino wool. The wool comes from a Colorado ranch owned by a scientist focusing on improving the genetics of the herd. This business relationship had already been established. Finding a cotton farm that met Brooklyn Tweed’s high standards was the first challenge. They learned about a Texas organic cotton farm while watching the documentary The True Cost. That farm turned out to be a perfect fit. The next big challenge was how to dye the fibers. Wool and cotton take color differently. Cotton provides an additional challenge as it takes color sporadically. You could dye each separately and then mix them together, trying for an exact match. Or you can achieve a marled effect with 2 different colors. Or as their mill suggested, you can dye the fibers together with a dye developed for one of the fibers and produce a faded effect normally produced through a hand-dyed method. And thus was born the first line of Brooklyn Tweed with no two skeins alike. Luigi’s excitement for the whimsy in Dapple was obvious. He encourages sweater knitters to be experimental with skein placement to get the best variation. Dapple’s playful nature is set apart from Brooklyn Tweed’s other lines’ classic and timeless colors. For me, the most interesting thing was learning about why they release only a few colors with each new line. The smaller palettes help local yarn shops adjust their space to new inventory. Too many choices can also overwhelm knitters already excited by a new yarn. Which of us hasn’t stood, mesmerized and drooling over a newly discovered yarn? Now we will all hold our breath until Dapple is released on July 15th with two new patterns by Jared Flood. Thank you, Luigi, for our sneak peek! We wrapped up with a virtual show and tell. Our knitters have been productive and have created some beautiful things. Want to watch the full meeting? Click here. by Kimberly Williams Our first virtual meeting was a success. Margaret welcomed people as they signed into the Zoom meeting. And what a breath of fresh air was that bit of normality in the face of our current situation. Anna Lorton has graciously volunteered to organize our member tips to make them a regular feature of meetings again. She started off with two great ideas. For those reluctant to speak in front of a crowd, you can ask a friend to present your tip. As well as technique tips, we can also share “knit-changing” book recommendations. Anna’s tip for this month was a game changer for Make 1 increases. Back by popular demand and bravely agreeing to be our virtual presentation guinea pig, Meaghan Schmaltz, aka The Unapologetic Knitter, spoke to us about the challenges of grading designs to achieve size inclusivity. Her passion for this movement was apparent immediately and outlined in three reasons to design for all body shapes. Community, pride in creation, and because it’s the right thing to do. When a pattern gains popularity and everyone is knitting it, a community is created around that pattern. If that pattern’s design limits sizes to a small range, many will be excluded. And isn’t one of the best parts of being a knitter the sense of belonging? When you knit a pattern and the design is thoughtful about each size, thus allowing the finished sweater to fit you well, pride will follow. Pride that you made this beautiful sweater, stitch by stitch. And hopefully, that pride will translate into self-love. There are many challenges to grading a pattern. Grading is adjusting a pattern for a range of sizes based on a sample size. Ratio of increases is not the same at every part of the sweater, collar, yoke, bust, sleeve, waist. Raglan yokes are especially hard to grade and maintain the 45 degree angle. To grade a pattern for an inclusive size range takes time. Either the designer must put in the effort themselves or hire technical editors, like Meaghan. What does all of this mean for knitters? Patterns will be longer with more breakouts—sections of the pattern written for a subset of sizes; for example, size 1,2,3 only, work these steps. More time on the designers part will increase pattern pricing. In our opinion, the cost will be well worth it. Meaghan also presented results from her size off comparison of Andrea Mowry’s Comfort Fade Cardigan sized using standard nomenclature (S,M,L) and the Weekender sized using numerical nomenclature (1,2,3,4). Part of this inclusive movement in knitting design is the shift in nomenclature. Meahan looked at 10 pages of Ravelry projects for each sweater. Out of the 320 projects of each design, 50% of the Comfort Fade reported the size made. Compare that to the numerical sized Weekender at 70% reporting the size made. Are people more comfortable with a method of naming sizes that does not include a negative connotation? It would seem so. This all goes back to the sense of community. Ravelry provides us with a place to share our projects and learn from others’ projects. How much more useful would this be if we all felt comfortable to share the size we made? Lastly, Meaghan highlighted some designers she knows who are doing the work to further embracing body positivity and size inclusivity. Jacqueline Cieslak is a great inspiration for both of these. Shannon Squire and Annie Lupton are making the effort to go back and regrade their designs for a wider range of sizes. Meaghan works with Trysten Molina and Andrea Mowry to create designs that have the same look at all sizes. Thanks, Meaghan, for a great presentation. Despite being virtual, we still wanted to do a show and tell. We asked the community to mail in their projects, and finished off the meeting with the below. We have been following the evolving COVID-19 situation carefully and doing our best to follow public health guidelines. With our community in mind,
the March meeting previously scheduled for Thursday, 3/12 and the Native Knits KAL evenings previously scheduled for Tuesday, 3/17, and Tuesday, 3/31 are postponed due to coronavirus. As soon as we have the arrangements complete, we will share the details with you. by Kimberly Williams Another great meeting of Puddletown Knitters Guild with a lot happening.
We received some adorable stuffed animals for our charity knitting project, bringing us to a total of 20. Don’t forget to tag @ButterflyBoxesPDX to spread the joy of crafting with a purpose. 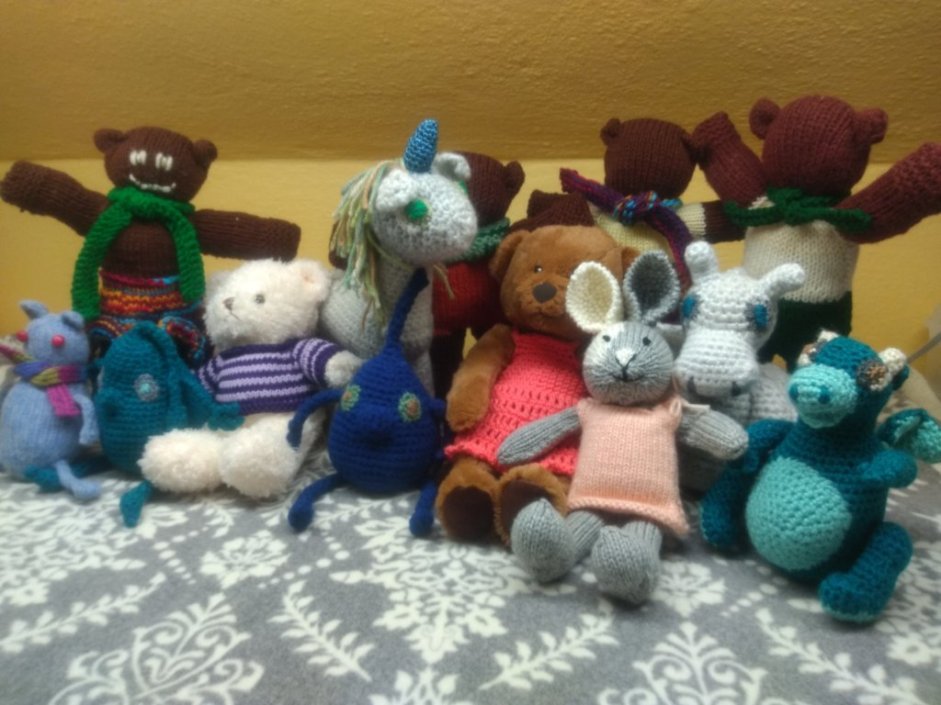 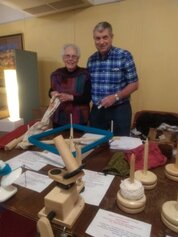 Exciting news for our guild. We are now sister guild to the Brave Girls, a group of new knitters in Rwanda and Uganda. Next month, Kathryn Gearheard, teacher to these women, will tell her story and share their goals. We will also be collecting straight knitting needles for her to take to the Brave Girls. So clean out your duplicates or purchase some new ones and bring them to the March meeting. Peter and Betty Charles were on hand to demonstrate their finely crafted swifts and winders. It was fascinating to hear the origin story of their company, Oregon Woodworkers. Betty’s LYS asked him to fix and recreate a shop swift that was always breaking. Peter spent the next two years perfecting the design. Their swifts come in a variety of woods, set up and pack up easily, and are pretty enough to leave out all the time. Even better, there are zero wood on wood turning points, so our PNW humidity won’t wreak havoc on your yarn winding. 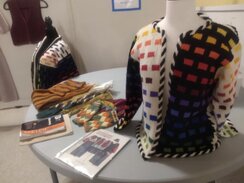
Our speaker had years of wisdom and stories to share with us. Yvonne inspired us with her designs and the process behind each. The highlights I took away are:
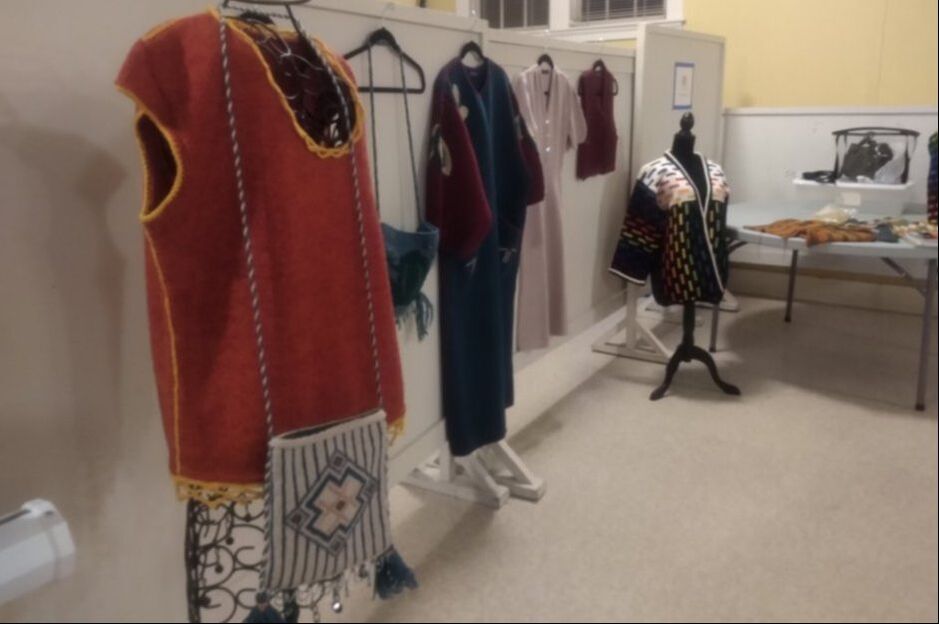 Examples of Yvonne's work she brought to show Post meeting book list from Yvonne, in no particular order:
And her latest purchase mentioned at the meeting:
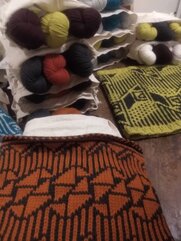
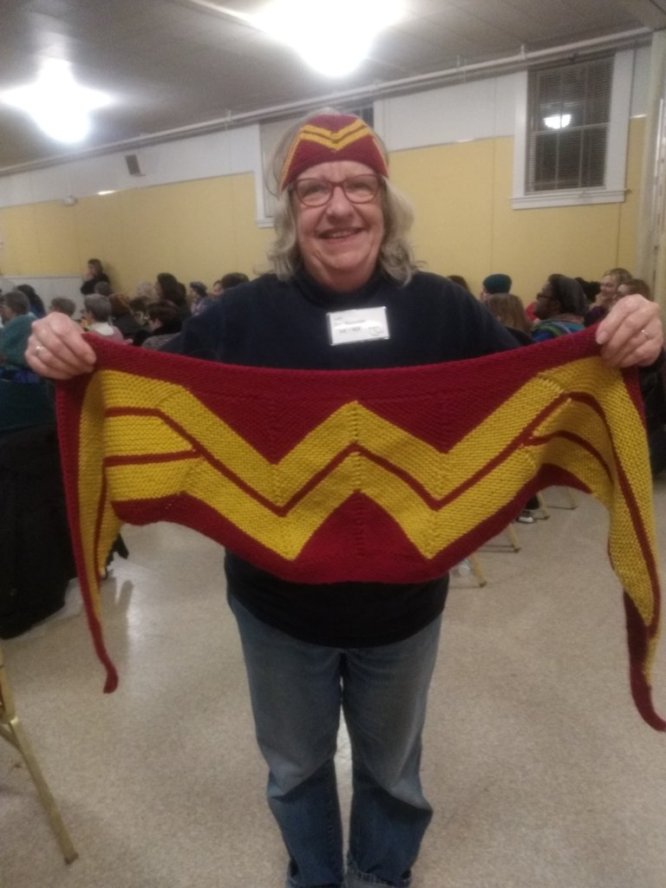
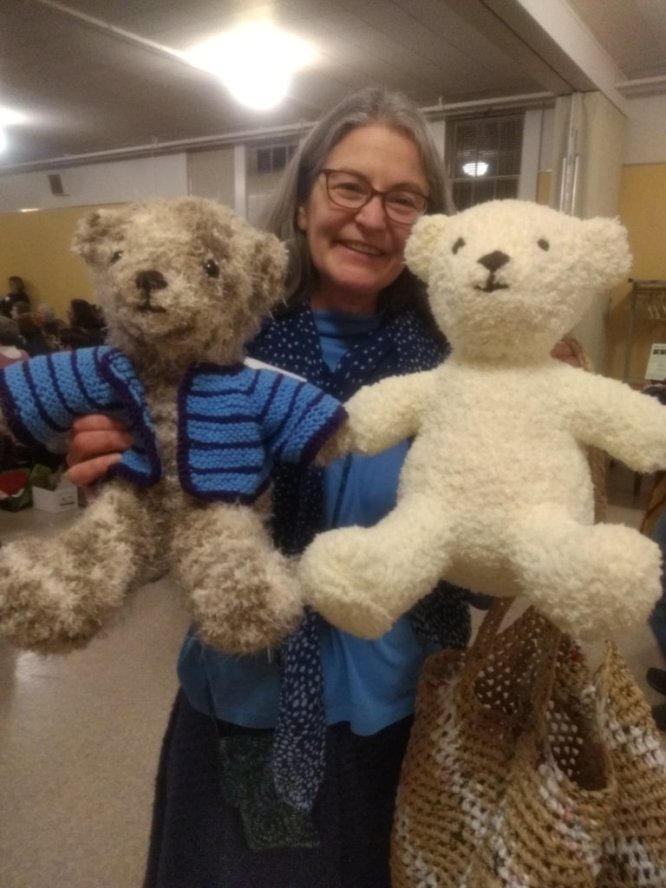
Show and tell
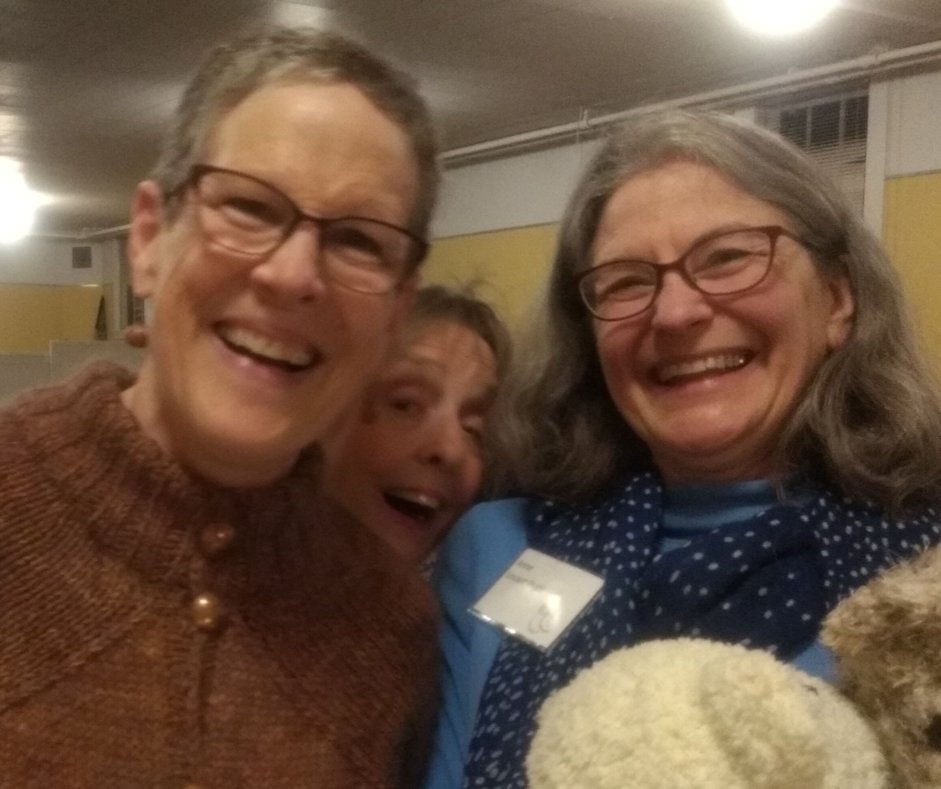 Margaret photobombing Anne and Susan Huffman (in her Carbeth Cardigan). |
Archives
March 2024
Categories |


 RSS Feed